Tuesday, September 26, 2017

New! - Lesson 12: How to Remove an Object in Pixlr

Getting Started

1) Open Pixlr Advanced

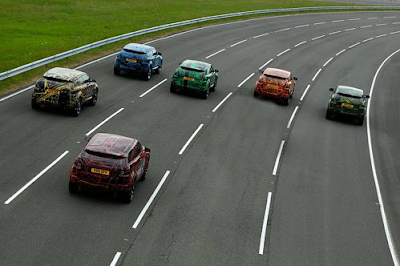
2) Open an image that you want to remove an object on it,
     https://blogger.googleusercontent.com/img/b/R29vZ2xl/AVvXsEjLlAxlO9b_a9qnnvIzz0hFJIEjp_b8fEJoHqUjmC_WneOX6m2w3028NrhS7cf2wxqpdvSesyrMHu-BoxkHNkLtutLeo4Bl3Kl8YKj2M3UgPCNjXLkPMkn_2h4CTPRlmRTqzrZ2lReyRVo/

Brush Adjustments


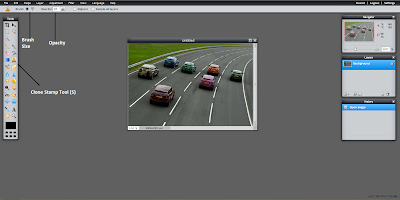
1) Select Clone Stamp Tool(s) from the tools menu on the left side of the screen.

2) Then adjust your brush size on the top of the screen according to object. I will go with 30.

3)After that, adjust the opacity. I recommend you to use a value between 90 and 100. I will go with 95.

remove unwanted objects


Note: If you have trouble about finding tools, this may help ; 
             Basics of Pixlr

Removing the object

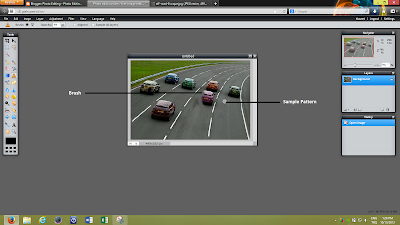
1) We have to take a sample pattern to apply it on   the object. 
   The Clone Stamp Tool is change the pattern as selected before
   In our example, I want to remove the pink car so that I have to choose the road pattern
remove unwanted objects
2) Press "Ctrl" to select the pattern.
3) You have be very careful while using this tool because. It does not stay stable while removing the object. The point the you choose will change according to your mouse movements.
4) By clicking the left button of mouse remove the object.
remove unwanted objects

Tricks

1) Move your brush in the same direction all the time. Otherwise, it will look like blurred.

2) If you are not satisfied with your sample pattern, you can always change it.

how to erase an object,

Tuesday, September 19, 2017

New! - Lesson 11: "BASIC" How to Replace the Color of an Object in Pixlr

The car example for color replacement included more advance tools and I decided to make a new tutorial for basic level. This tutorial does not consist more than Lesson 4.

Getting Started

1) Open Pixlr Advanced

2) Open an image that you want to replace it's color,
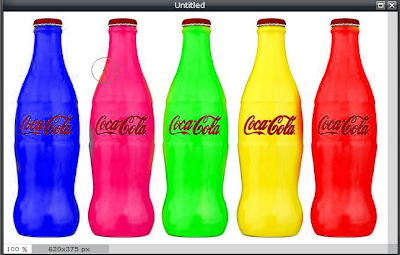
     http://hypebeast.com/image/2009/05/selfridges-coca-cola-centenary-bottles.jpg


Pixlr Color Replace Basic

Replacing Color 


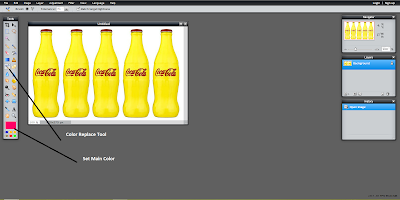
1) Go to the Tools Menu which is on the left side of the screen and choose the Color Replace Tool.

2) Select a color by clicking set main color. (At the bottom of that Menu)

How to Replace the color of an object


3) Adjust the Tolerance according to color image and color tones. 

4) Select a brush size according to your object.

Pixlr Color Replace Basic


5) Start Replacing like painting the object :) 

Pixlr Color Replace Basic

Tuesday, September 12, 2017

New! - Lesson 10 : How to Remove the Background of an Image in Pixlr

Getting Started

1) Open Pixlr Advanced

2) Open an image that you want to remove and delete the background of it,
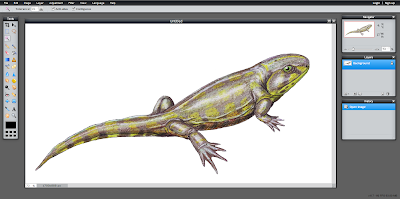
     http://upload.wikimedia.org/wikipedia/commons/7/7b/Eucritta1DB_white_background.jpg


Select the Part

1) Use Wand Tool (W) or Lasso Tool (L) to select the part that you want to take out from the image. I am going to use the Wand Tool (W) so that I have to do one more step.


1a) For only Wand Tool (W) users: Go to Edit Menu on the top of the screen and click on Invert Selection.


Copy the Image and Paste


1) Go to Edit Section again and press Copy ( Ctrl + C) 


2) Go to Edit Menu Again :) and push Paste Button ( Ctrl + V)

Removing the Background ( Delete)


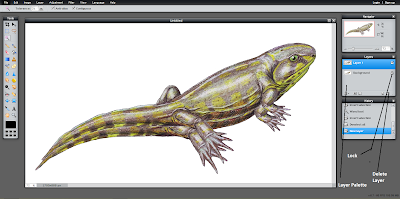
1) You are going to see that there is a new layer created on Layer palette on the right of the screen. Double click the lock near the Background Layer which is under the Layer 1. It will switch to ticked box as Layer 1.

2) Then while Background Layer selected, press the Delete Layer in the Layer Palette.


Saving the New Image


1) Save as PNG otherwise it won't be as you want.


Tuesday, September 5, 2017

New! - Lesson 9: How to Write a Patterned Text in Pixlr

Getting Started

1) Open Pixlr Advanced
2) Click to Create a new image and create 800x600 sized image. (The 800x600 is optional)

Writing The Text  

1) Click Type Tool (T) on the Tool Menu and add the text that you want to make patterned. (Wide Latin, size: 103)

2) Use Move Tool (V) to put the text at the center of the image
3) Go the the Layers Menu on the right side of the screen between the History Menu and Navigator. Right Click to the Layer which contains your Text and select Merge Down

4) Then, double click to the locker in the Layers Menu, near the Background text. It should turn to a checked box

Adding The Pattern Image

1) Go the the Layer Menu on the top of the Website which is in the black stripe near the Image Menu. After that, open an image from your computer or URL. My pattern's URL: http://3.bp.blogspot.com/-TgyfpYbTFz0/UBjatFWB7_I/AAAAAAAABg4/vW8CZU_NuW8/s1600/Hawaii-beach.jpg


2) There will be Layer 2 and Layer 0 come up in the Layers Menu on the right side of the screen. Go to Layer 0 which contains your texture and surround the Text with using Wand Tool (W)

TRICK: If you have a letter like A and R, Do not forget to surround the inner part of it with using Shift Button and Wand Tool (W)


3) Now, Scroll the Layer 2 to the Layer 0's place with grabbing and dropping with your mouse.


 4) When you get a image as in the picture, Use the Eraser Tool (E) and start to erase the background.


 Details


1) Go to the Edit Menu and press Deselect All (Ctrl + D)

2) Use the Layer Styles to give shadows of your text.


3) In the Layers Menu, right click to Layer 2 and press Merge Down.

4) Save it in PNG format from the File Menu.